
Welcome to Getting Started: Item Attributes. In this video, we will do a deep dive into Kibsi attributes. Kibsi attributes enrich our data models and provide a layer of customization beyond our building blocks. Watch the video below to learn more.
If we think about a data model as tables, rows, and columns, then item types and events are the tables in our data model. The individual static items we deploy, each item our app detects at runtime, and each instance of a triggered event will become the rows in our data model when we launch our application.
Then, generally speaking, attributes are like the columns in our data model that allow us to define additional data points that we want to be associated with each row in our data. Alternatively, using a relationship attribute, we can define relationships with other item types.
Let’s take a detailed look at all of the Kibsi attributes, and for each one, describe how they work, the kind of data they add to the data model, and which item types support them.
We’ll also talk about what values an attribute will return when we reference it using the Kibsi Expression Language, or KEL. Be sure to check out our getting started video on KEL to learn how to write your own KEL expressions to get the data model that you want.
Whenever you want to add an attribute to your data model in the app designer, just click the plus icon on the item type. This will open the ‘add a new attribute’ panel that lists all the attributes supported by that item type. Then, click the attribute you want to configure your new attribute.
Simple Attribute:
A simple attribute is used to add text, number, or boolean data to an item. Both static and detected item types support simple attributes. KEL is not used when defining a simple attribute. Referring to a simple attribute in a KEL expression will simply return the string, number, or boolean True/False value that the attribute holds, just like referencing a cell in a spreadsheet returns the value of the cell.
Simple attributes can be used in many ways, but one common use is to provide a unique name for regions on a static item type.
To configure a simple attribute, give your attribute a name, choose text, number, or boolean data type, add an optional default value, and click save. Every instance of that item type will have a column for that attribute with the default value if you defined it. Referencing that attribute in a KEL expression will return the value held by the attribute.
Count Attribute:
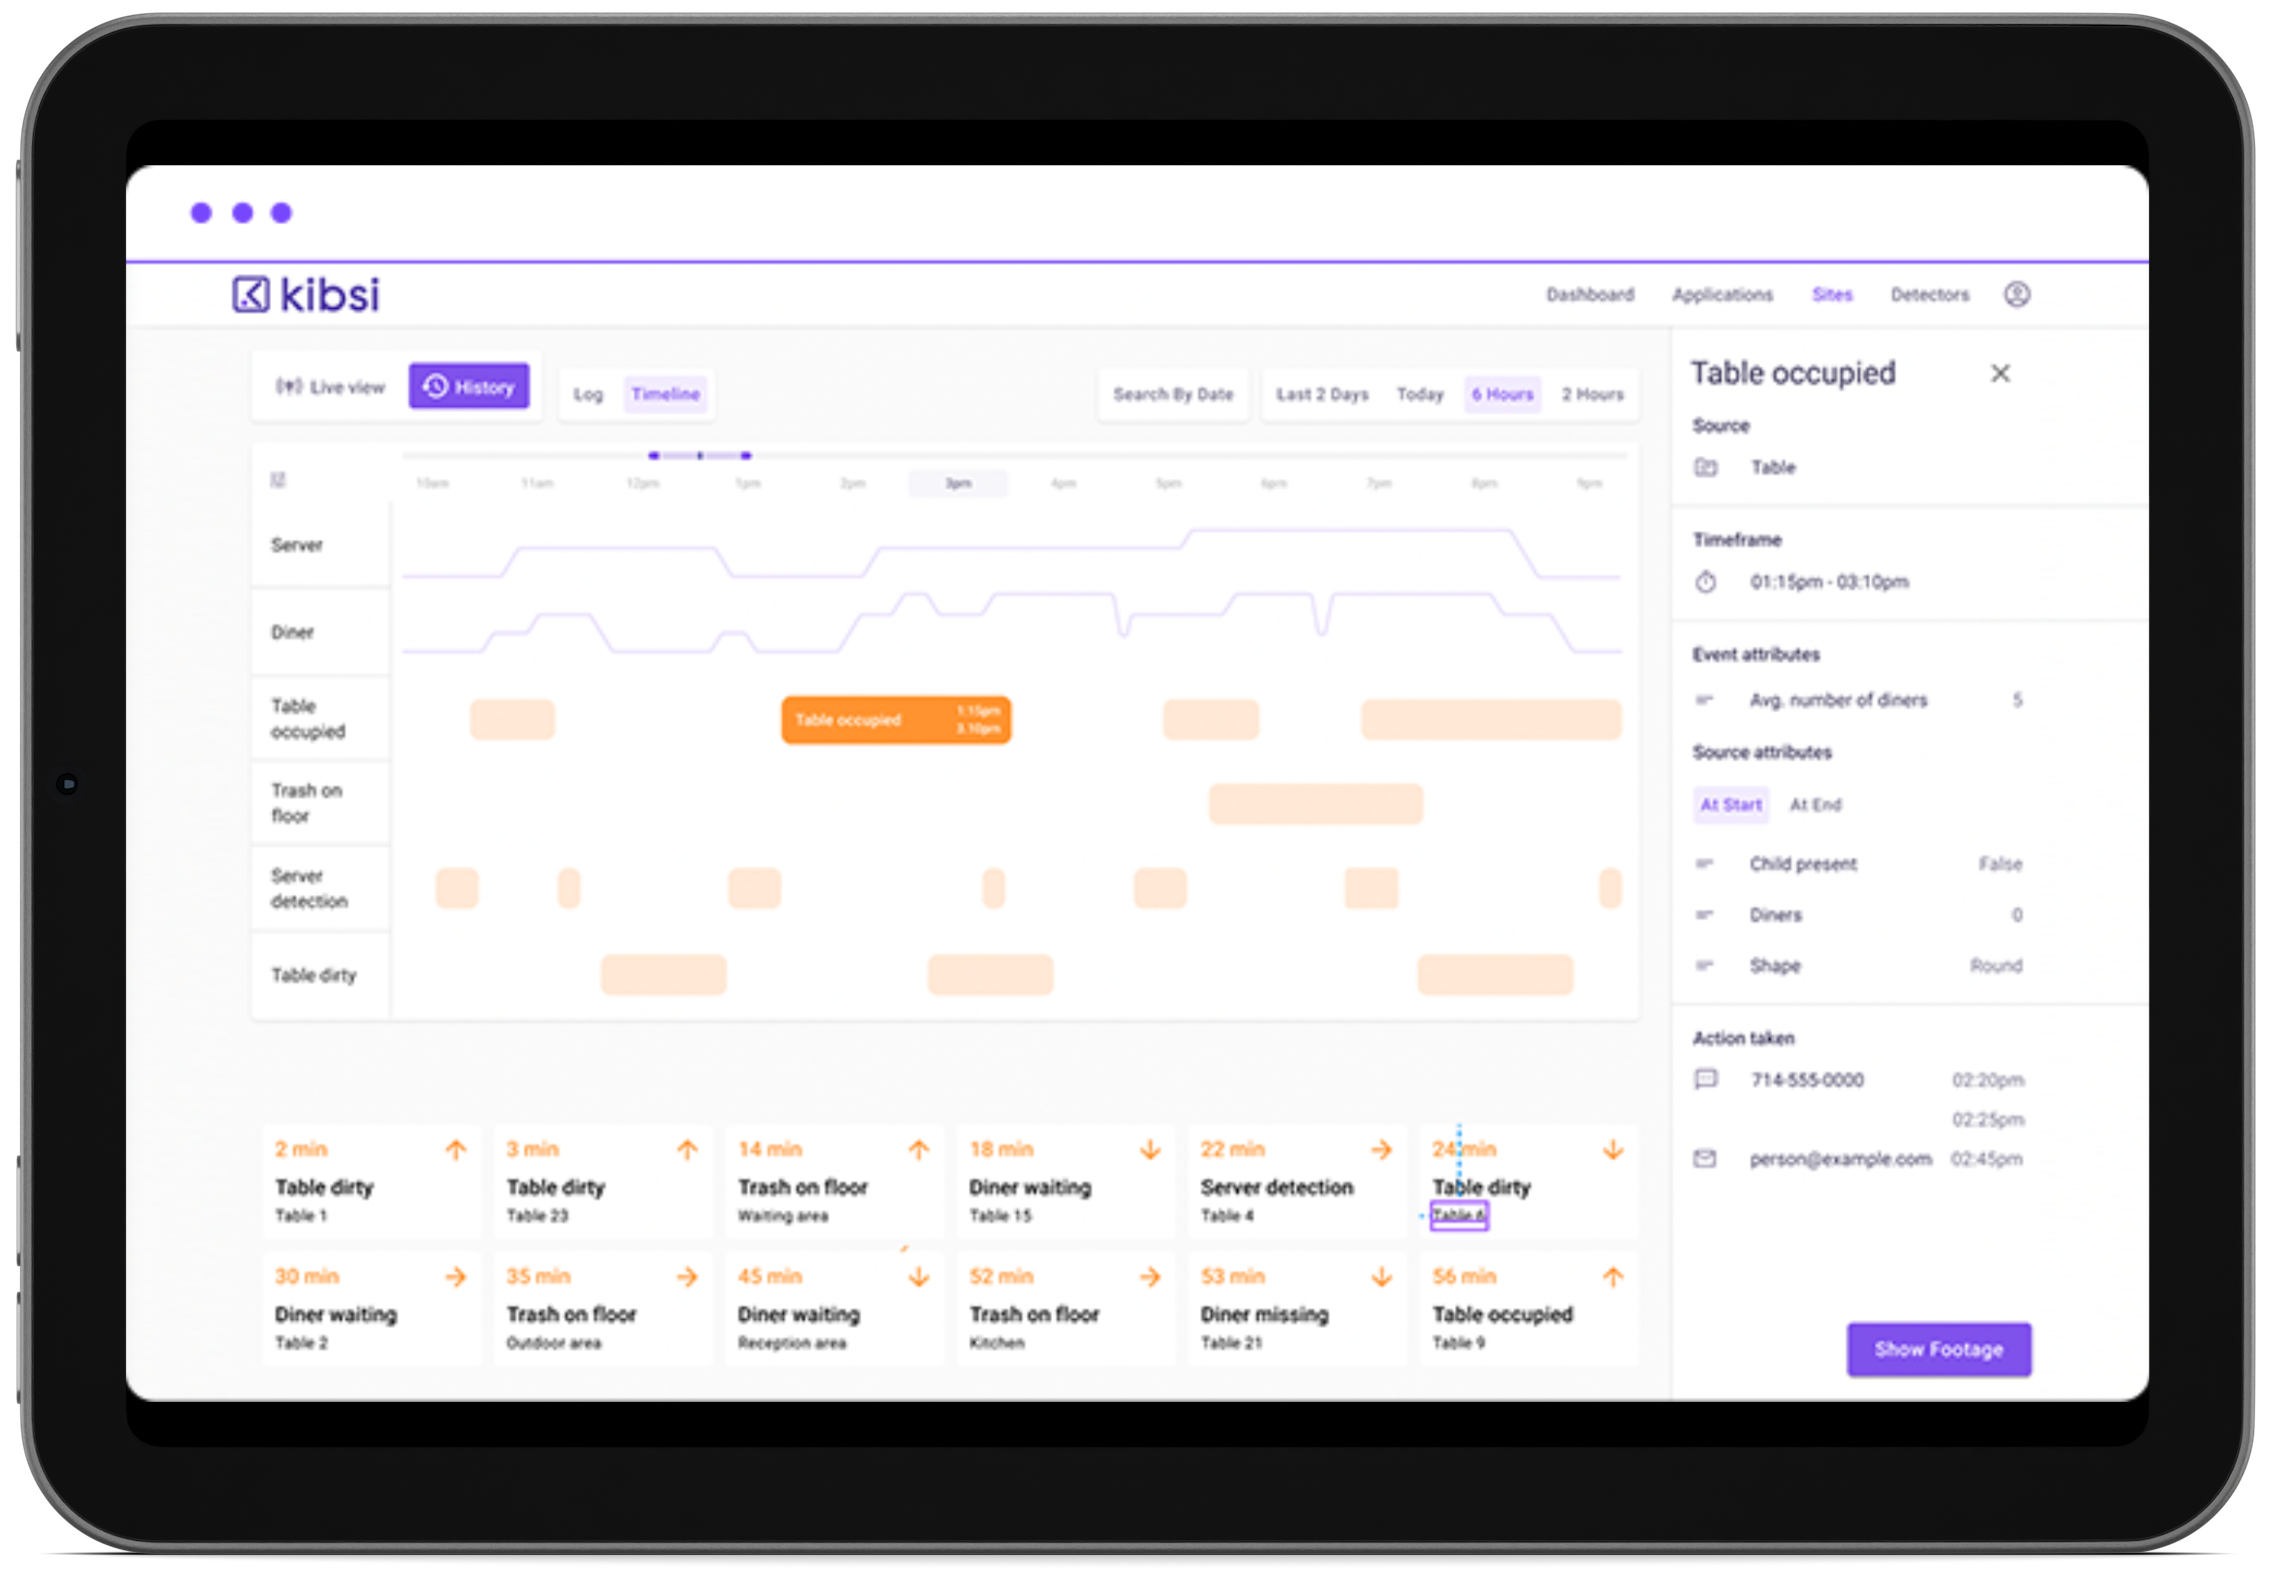
A count attribute is used to count the number of an item or an attribute. Both static and detected item types support count attributes. Using KEL as a filter expression is optional when defining a count expression. When referring to a count attribute in a KEL expression, if the counter is configured for ‘any given time,’ it will return a number. If a time period is specified, it will return a special data type that includes the current, min, max, and unique values time period.
These specific values can be referenced in KEL by appending .count, .min, .max, and .unique to the count attribute ID.
Count can be used in many different ways, but one common use for count is to return the number of items that are in a relationship array, such as ‘vehicles per hour’ or ‘forklifts in the safety zone.’ Count can also be used to return the number of a particular detected item type or event.
To configure a count attribute, give the attribute a name, choose the item type or relationship you’d like to target for the count, add an optional filter expression, then choose a time interval for your count. The time interval will determine whether to continuously update the count based on what’s seen at any given time, in real-time, aggregate the count over a rolling time interval, or reset the counter within a timeframe specified by a schedule. Finally, click save.
Formula Expression
A formula expression is used to compute an attribute value. You can think of this as using a formula in a spreadsheet to determine the value of a cell. In a formula expression, you can refer to other attributes to use their values, specify your own values, or a combination of both. All Kibsi item types support formula expressions, and using KEL is required when defining a formula expression. Referring to a formula expression attribute in a KEL expression will return the string, number, or Boolean value of the evaluated expression.
To configure a formula expression attribute, give the attribute a name, and provide the KEL expression to calculate the value you want. You can use arithmetic operators to return simple numeric values, and you can also use comparison operators to return True or False values. That is, when the comparison is True, the value of the attribute will be true, and when the comparison is False, the value of the attribute will be false.
Also, note the autocomplete suggestions here to make it easier to write your KEL expression. You can also add an optional delay to your expression. Delays are useful to “debounce” or stabilize your value by waiting a certain number of seconds after a change is detected before deciding to commit a new value to the attribute. This can help prevent momentary changes or anomalies in the video stream from creating unwanted values in our data model. Finally, click save.
Relationship Attribute
A relationship is used to define a relationship between two item types, much like you would create a relationship between two tables in a relational database. Relationship attributes are one of the most important and powerful features of working with Kibsi.
Both static and detected item types support relationships, and referring to a relationship attribute in a KEL expression will return an array of items in the relationship. In a boolean context, referring to an empty relationship array will return False, and referring to a non-empty relationship array will return True. We can count the number of items in a relationship array using a count attribute or work with the array directly using KEL expressions.
While using KEL to define the relationship is supported, one very common way to use relationships is to determine when a detected item type is inside a region of a static item type using the built-in Proximity relationship type.
To configure a relationship attribute, name the relationship, and choose the target of the relationship, that is, the item type that you want to create the relationship with. Note that relationships are bi-directional, meaning if you create a relationship from one item type to another, a second relationship is automatically created in the other direction. For example, let’s take a proximity inside the relationship created by a pedestrian to the crosswalk. This will automatically create a second relationship from a crosswalk to the pedestrian. The pedestrian side of the relationship will return an array that includes all the crosswalks that a pedestrian is inside, and the crosswalk side of the relationship will return an array that includes all the pedestrians that are inside a given instance of a crosswalk region.
Next, choose the relationship type. In this example, we’ll use a proximity relationship. Finally, choose the evaluation position. This will determine what portion of the detected item is used to determine if it’s inside the region or not. For example, we’ll often choose “bottom” as an evaluation position to determine when detected people are inside a region, to focus the detection more on the feet of the detected person. Finally, click save.
Region Attribute
A region attribute is used to associate a named region with a static portion of the frame from our camera stream. Only static item types support regions, but it’s important to note that the bounding box of a detected item type can also be used in exactly the same way as a static region.
KEL is not used to define region attributes, and referring to a region attribute in a KEL expression will return a list of unique identifiers representing polygons on the screen associated with each region. We can also refer to a region attribute in KEL to determine a given item’s current interaction state with a named region.
One very common way to use regions is as part of proximity inside a relationship to determine if one or more detected item types are in a static region of the video stream.
To configure a region attribute, simply give your region a name and click save.
Class Attribute
A class attribute is used to map the detected item’s class into an attribute value.
Only detected item types support item classes. KEL is not used to define class attributes, and referring to a class attribute in a KEL expression will return the string value of the class that is output by the detector.
Class attributes make it possible to configure one detected item type that uses multiple detectors and still have access to all the classes that each detector outputs. For example, we can configure a “vehicle” detected item type that uses every vehicle detector available in the Kibsi library without having to define a separate detected item type for each vehicle detector. Or an ‘Animal’ detected item type that uses every animal detector in the library without having to configure a detected item type for each animal.
So, item class attributes make it easier to keep our Kibsi applications simple and clean without losing any of the data points provided by the individual detectors.
To configure an item class attribute, simply give it a name (such as type or class or whatever works for your data model) and click save. Kibsi will automatically map whatever value the detector outputs to the value of the item class attribute.
Location Attribute
A location attribute will periodically sample and provide the location information for a detected item’s bounding box.
Only detected item types support locations. KEL is not used to define location attributes, and referring to a location attribute in a KEL expression will return the bounding box info for each detected item.
This data is intended to be used for integrations with other applications and building more complex apps and visualization on top of the data stream. Because bounding box data is a bit verbose, it’s not included in the Data views or Visual Debugger tables. But if a location attribute is configured, you can see the bounding box data in the data stream .json in the visual debugger.
The values shown here represent the x, y, width, and height of the bounding box. These are all expressed in percentages of the total frame width and height. The x and y determine the top left corner of the bounding box, and width and height are measured from that top left corner.
To configure a location attribute, simply give the attribute a name, choose a sample rate to determine how frequently the location data will be updated, and click save.
State Machine Attribute
First, let’s take a look at the state machine attribute, which is used to track various states of an item through its lifecycle. All Kibsi item types support state machines, and using KEL is required when defining a state machine. Referring to a state machine attribute in a KEL expression will return the string value of the current state of the item.
To configure a state machine, give the state machine a name, and then add the states for your state machine one at a time. Notice that the first state you define is automatically assigned the default state, and you can change the default to any state. Next, drag transition lines from each state to the states you want to enable transitions from and to. Then, click on each state to provide a boolean KEL expression you want to use to trigger the state change. That is, when the expression returns True, it will trigger the transition to the next state. Otherwise, it will remain in the current state. Finally, click “save” to finish your state machine attribute. Now, the value of the state machine attribute for a given item will change as that item satisfies the rules you defined for each state.
Actions Attribute
Next, let’s take a look at the actions attribute, which is used to take a particular action whenever an event is triggered. Only event item types support actions, and using KEL is not required when defining an action. Currently, Kibsi supports sending a Webhook as an action, and in the future, support will be added for actions to send emails and SMS messages.
To invoke a webhook action, choose whether you want to trigger the action at the start or end of the event, or both. You can also choose if you’d like an image snapshot of the event to be sent with each action. In the future, you’ll also see options for capturing short video clips. Provide the URL and auth token for your API endpoint, and click “save”. Now, every time the event is triggered, Kibsi will take the action you defined.
Enhancers Attribute
Finally, let’s take a look at the enhancers attribute, which is a special class of attribute that determines its value by incorporating additional computer vision models into our application.
Enhancers are supported by both static and detected item types but work differently depending on the item type that is being used.
For detected item types, the list of available enhancers depends on the detector used. For example, the person detector has enhancers available for age, gender, and PPE state. If no enhancers are listed for your detected item, it means that none are available for the detectors you are using. Enhancers for detected item types can be added when creating the item or added later using the PLUS icon.
For static item types, enhancers can only be added after creating the static item. There are enhancers available for determining color as well as scene changes or motion. Be sure to check out the Kibsi documentation for information on the different types of values that each enhancer returns.
In either case, adding an enhancer is easy. Simply name your enhancer, choose the enhancers you want to enable, select Delay and State Tracking options (which are supported for both static and detected enhancers), and click save.
One last note on attributes: you will notice that some attributes have an option to enable tracking. When tracking is enabled on an attribute, referring to that attribute in a KEL expression will return a different kind of data structure that includes accessible properties for the current, first, and last values of the attribute, as well as the timestamp for when those values were set.
When writing KEL expressions that refer to tracked attributes, you can access those values the same way we did for the current, min, and max values of the count attribute. Simply append the tracked attribute ID with dot current, dot first, or dot last and then either dot value or dot time, depending on which data point you want.
We hope you enjoyed this getting started video on Kibsi Attributes. Be sure to check out our full Getting Started series for additional Kibsi videos. Thanks for watching!